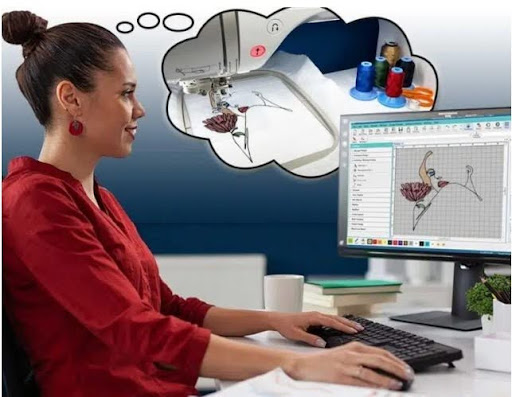
Many people have a logo, photo, or graphic and want to turn it into embroidery. The idea sounds simple. Upload the image, load the file, and stitch it out. But real embroidery needs more than a picture file.
That is why JPG To DST Conversion is a common step for embroidery users who want better machine results. A JPG is only an image. A DST file is a stitch file. To get sharp results, the design must be built the right way.
Why Picture Files Need Conversion
A machine cannot read a JPG image like people do. It needs stitch commands.
A Picture File Shows:
- Colors
- Shapes
- Lines
- Text
A Stitch File Tells the Machine:
- Where to stitch
- What order to stitch
- When to trim
- When to change color
- How dense stitches should be
This is why conversion is not just saving a file in a new format.
Why Sharp Stitch Files Matter
A clean stitch file improves both look and speed.
Benefits of Sharp Files
- Smooth machine runs
- Clear text
- Better shapes
- Less thread breaks
- Professional finish
Poor Files Cause
- Rough edges
- Gaps
- Thread nests
- Slow production
- Bad customer results
Start with a Good Image
The better the source image, the better the final stitch file.
Best Image Types:
- Clean logo
- High-resolution image
- Strong contrast art
- Clear text
Avoid:
- Blurry photos
- Screenshots
- Tiny logos
- Busy backgrounds
Good input saves time later.
Simplify the Design First
Not every image detail should be stitched.
Smart Cleanup Includes:
- Remove tiny shapes
- Simplify shadows
- Thicken thin lines
- Clean text spacing
Embroidery needs practical detail, not every pixel.
Step-by-Step Guide to Get Sharp Stitch Files
Let’s go through the full process.
Step 1: Review Final Size
Know how big the design will be.
Why It Matters:
- Small sizes need less detail
- Large sizes allow more detail
- Text limits change by size
A file for 2 inches is different from a file for 8 inches.
Step 2: Choose the Right Stitch Types
Each area needs the right stitch.
Common Types:
- Satin for text and borders
- Fill for larger areas
- Running for detail lines
Wrong stitch choice can ruin sharpness.
Step 3: Set Good Density
Density means how close stitches sit together.
Too High:
- Stiff design
- Thread breaks
Too Low:
- Gaps show
Balanced density gives smooth coverage.
Step 4: Add Underlay
Underlay is the support layer below top stitches.
Benefits:
- Holds shape
- Smooth surface
- Better coverage
This is key for clean embroidery.
Step 5: Plan Stitch Order
Sequence affects final quality.
Good Order Means:
- Less travel
- Fewer trims
- Better alignment
Smart pathing creates cleaner output.
Step 6: Adjust for Fabric
One file does not fit every fabric.
Cotton:
Easy and stable.
Caps:
Need center-out stitching.
Towels:
Need topping and stronger fill.
Stretch Wear:
Need lighter density and support.
Why Manual Digitizing Beats Auto Tools
Auto tools can help, but they often miss quality details.
Auto Tool Problems:
- Too many stitches
- Rough pathing
- Poor text results
- Extra trims
Manual Work Adds:
- Better planning
- Cleaner edges
- Fabric-based edits
- Professional finish
That is why experience matters.
Real Experience: Common Issues We See
Many first-time users send low-quality logos and expect sharp embroidery. This often leads to disappointment until the file is rebuilt properly.
Teams like Absolute Digitizing often help convert artwork into clean stitch files by fixing lines, spacing, density, and pathing before production begins.
Common Problems and Fixes
Text Looks Messy
Cause:
Too small or wrong stitch type.
Fix:
Use larger text and satin stitch.
Design Pulls Out of Shape
Cause:
No pull compensation.
Fix:
Adjust stitch width for fabric pull.
Thread Breaks Often
Cause:
Heavy density or poor thread path.
Fix:
Reduce density and clean sequencing.
Gaps in Fill Areas
Cause:
Low density or bad angle.
Fix:
Rework coverage settings.
Best Practices for Better Results
Use Clean Artwork
Sharp art helps sharp stitching.
Share Final Fabric Type
The file should match the material.
Test Before Full Run
Always sew one sample.
Keep Editable Master Files
Future edits become easier.
Why Good Files Save Money
Poor files waste more than thread.
Hidden Costs:
- Rejected garments
- Lost time
- Extra labor
- Repeat runs
- Customer complaints
Good files reduce these problems fast.
How Sharp Files Help Businesses
If you sell embroidery, quality builds trust.
Customers Notice:
- Clean logos
- Straight text
- Smooth fills
- Strong finish
Reliable output creates repeat orders.
Many growing shops use Absolute Digitizing because better files mean smoother production and happier clients.
Mistakes Beginners Make
Avoid these common issues.
Using a Screenshot Logo
Low quality leads to weak results.
Making Text Too Small
Tiny letters may fail.
Ignoring Fabric Type
A cap file differs from a shirt file.
Depending Only on Auto Conversion
Software needs human edits.
Tips from Real Production Work
These habits help often.
Slow Down for Fine Detail
Some designs stitch cleaner at lower speed.
Change Needles Often
Fresh needles improve quality.
Use Good Thread
Cheap thread can break more.
Keep Notes
Save settings for repeat jobs.
Why Professional Help Matters
Digitizing is both art and technical skill.
Professionals Understand:
- Stitch behavior
- Fabric movement
- Machine limits
- Clean sequencing
A trusted provider like Absolute Digitizing can turn image files into strong stitch files ready for real production.
EEAT in Embroidery Work
Quality embroidery depends on real standards.
Experience
Hands-on production knowledge.
Expertise
Knowing stitches, fabrics, and machines.
Authority
Consistent clean results.
Trustworthiness
Reliable files that run well.
These values matter for every serious order.
Final Thoughts
Getting sharp stitch files from picture designs takes more than changing one file type into another. It requires cleanup, planning, digitizing skill, and testing.
Start with a clean image. Simplify details. Use proper stitches, balanced density, and smart sequencing. Match the file to the fabric and machine.
When done right, your design becomes smooth, sharp, and ready to impress on every stitch run.